The First in the Deck Series

Our most recent DIY experience through the process.

Out With The Old, In With The New

Gotta love a new beginning, right?

Peppermint Shortage

Just a funny afternoon.

Coffeyville, KS

I loved this experience so much that I had to write about it. Then, through e-mails it spread to Coffeyville itself.

Photo Restoration

I had a lot of fun with this "old school" photo. It turned out too cool to not blog about it.

Kitchen Remodel (part one)

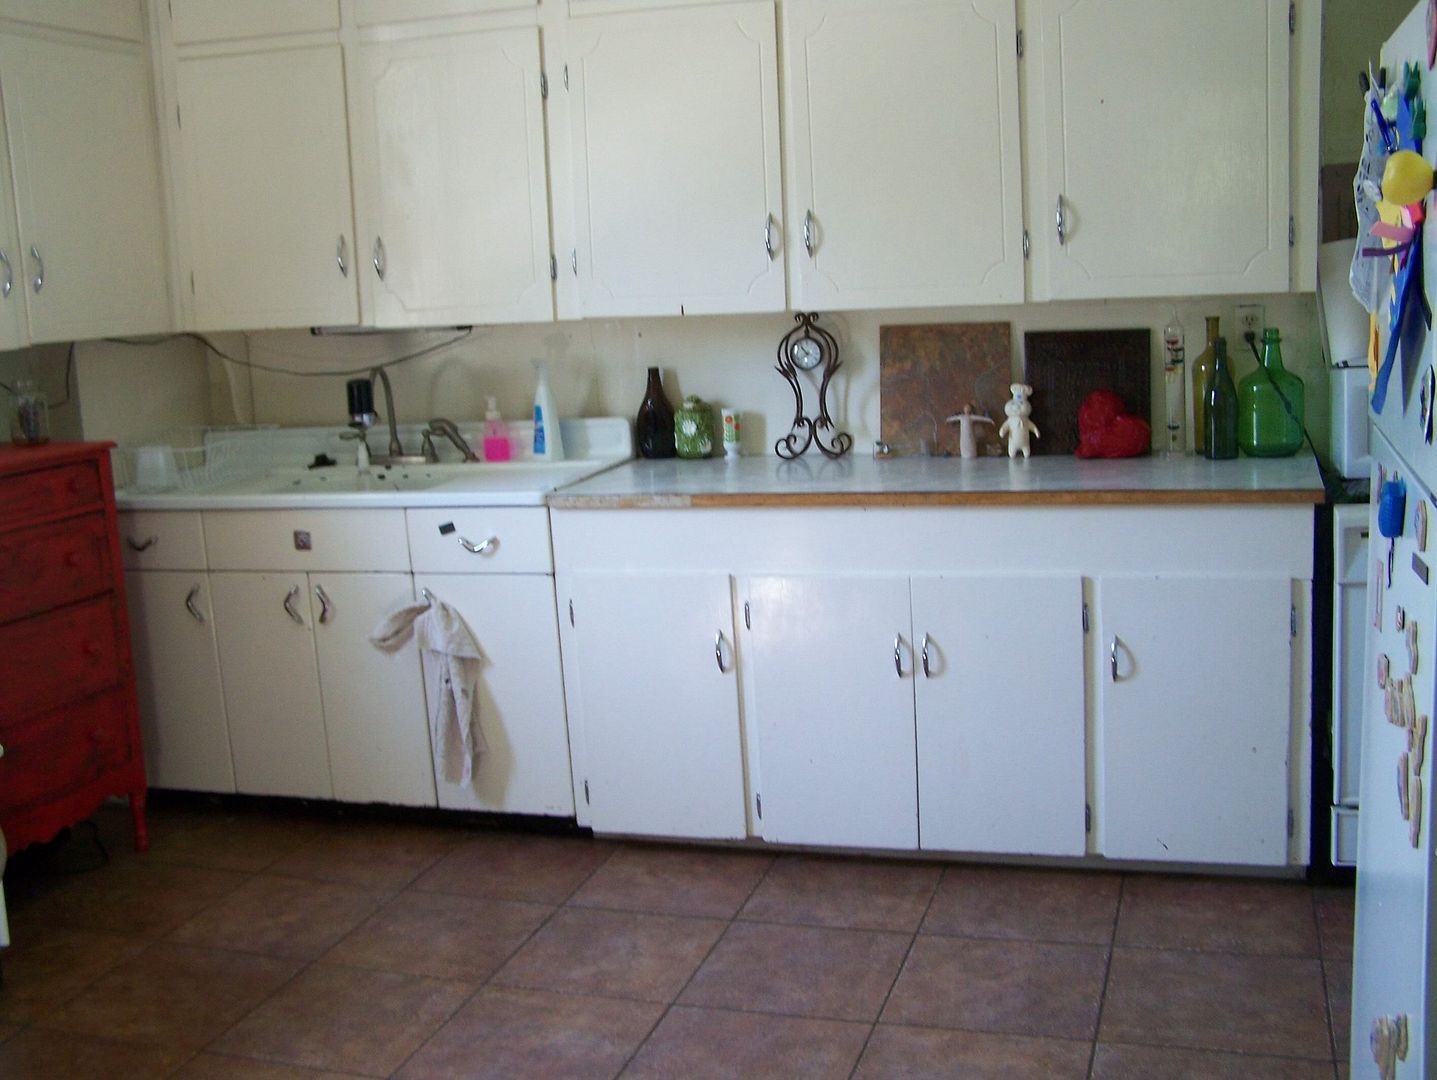
This is the first of a nine-part series documenting the remodel of our 50-year-old kitchen in our 100-year-old home!

Kitchen Remodel (part seven)

We left off last time with the highly anticipated arrival of the cabinets that we had custom built. Due to the sheer number of cabinets, the fact that we ordered them all with raised panel doors, and the strange somewhat large custom sizes we had ordered there was a significant delay getting them built. However, once they were finished, the sales guy that we had bought them through was gracious enough to trailer them over to our house in his personal truck. That was a nice touch and very helpful since I was going to have to use the van and it would've probably taken me at least four trips back and forth to get them all. A couple pieces weren't right so he took them back with him to get reworked. We were still going to be waiting on the cabinet that we ordered later for the corner for our coffee station opposite the rest of the cabinets. But, we were very satisfied with their quality and appearance.

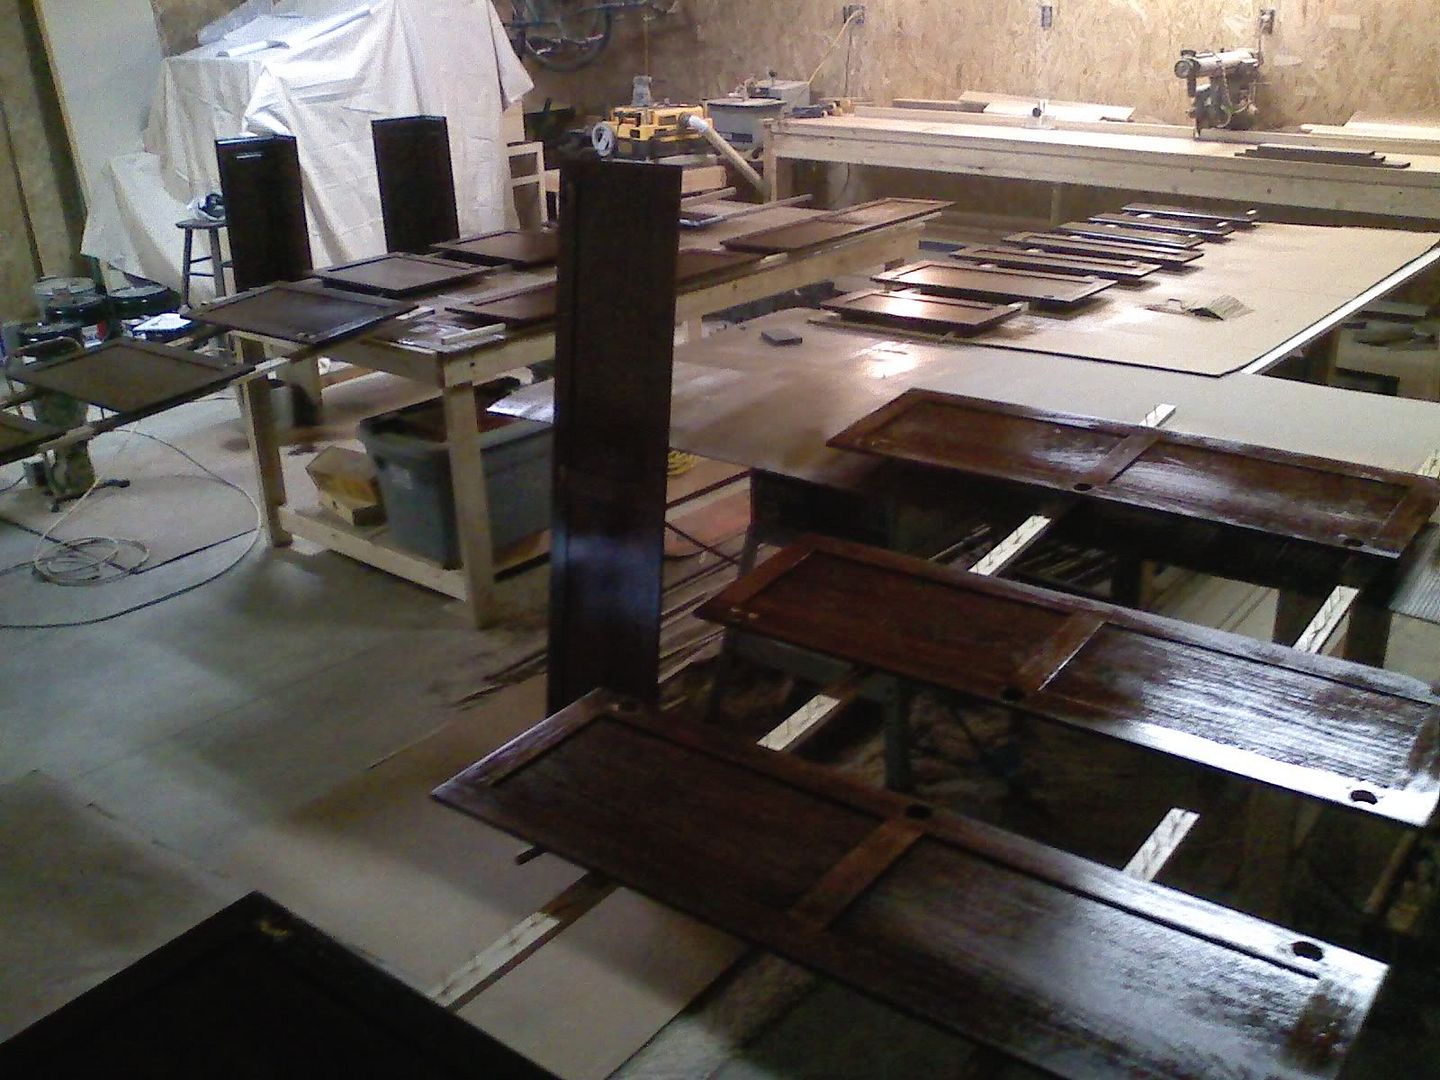
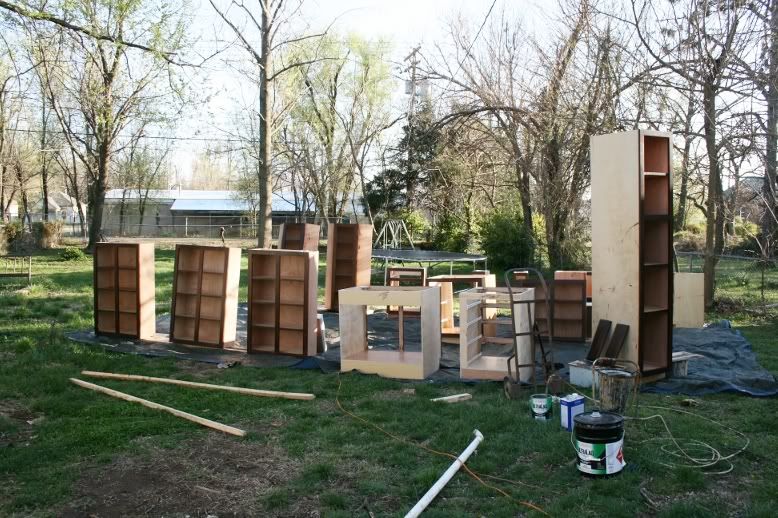
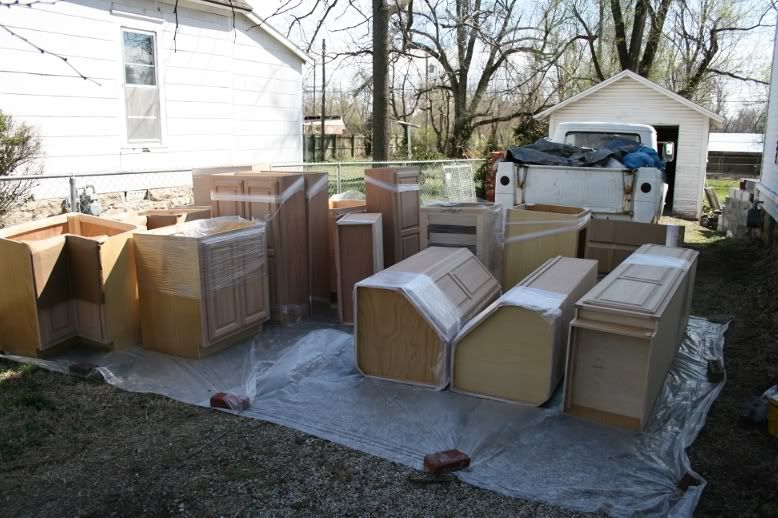
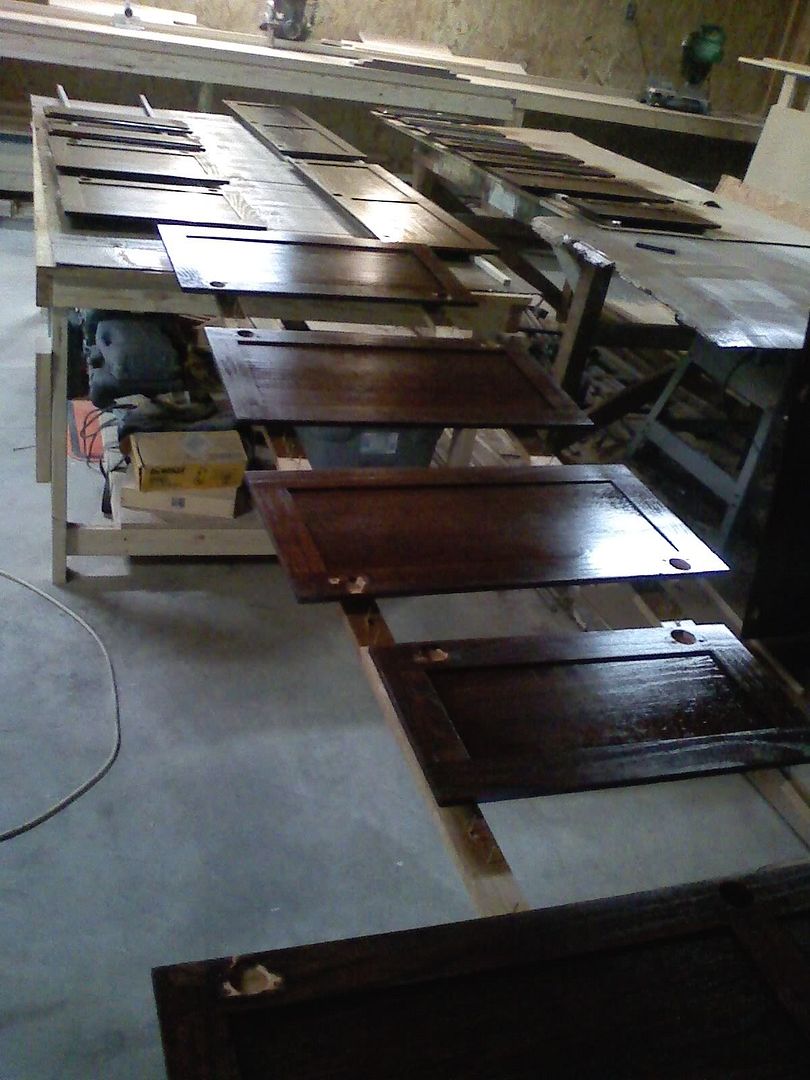
We didn't want to stain or finish the cabinets inside due to the amount of fumes and overspray that would result. So, we bought some plastic sheeting and prepared both the driveway and the garage. I had to pull my '59 Ford out of the garage to allow for inside storage of the cabinets while they dried and for between steps. Jodi did pretty much all the staining work while I did all the finishing. We took all the doors off and bussed them over to Scot's shop to finish them. Scot showed me how it's done and I took off with them. It's a good thing he has a big shop because we were seriously running out of room as we were laying them all out to be sprayed. You can see from the first two photos how many there were.

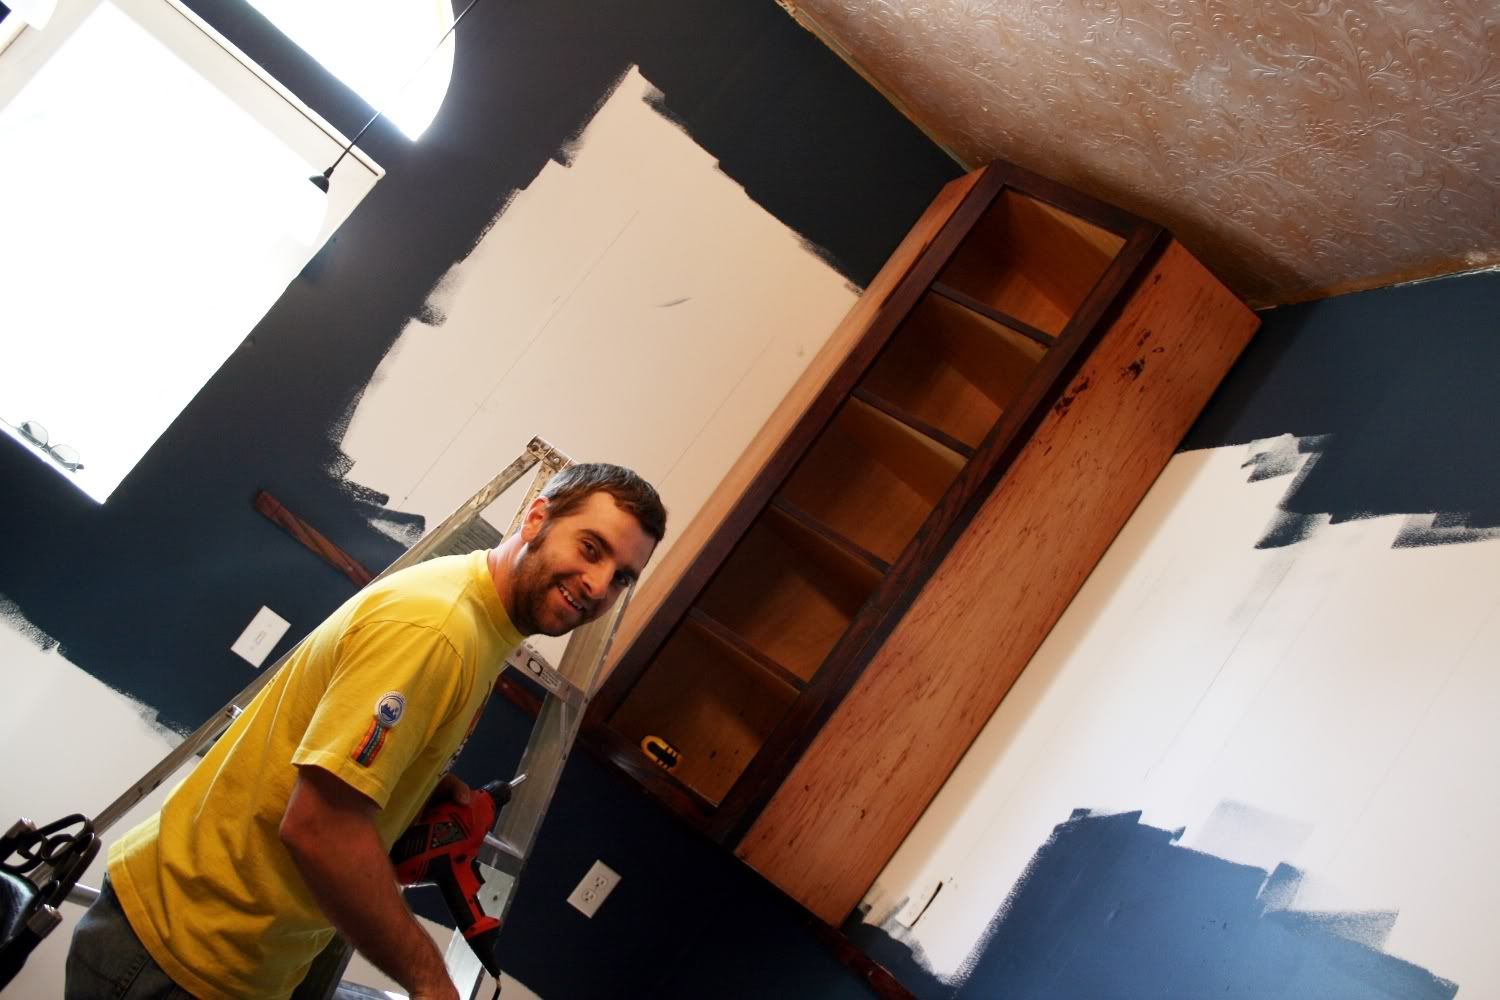
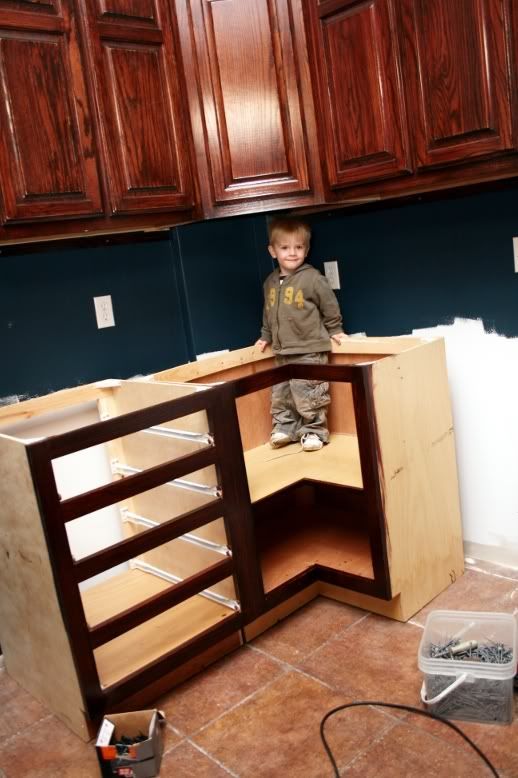
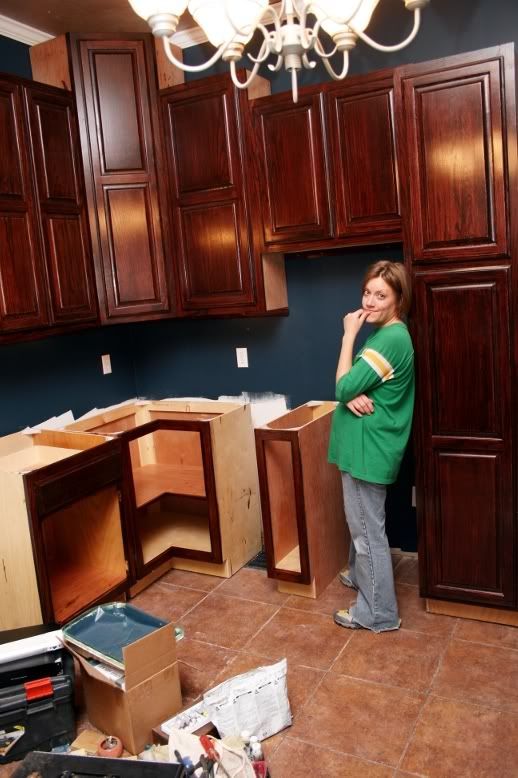
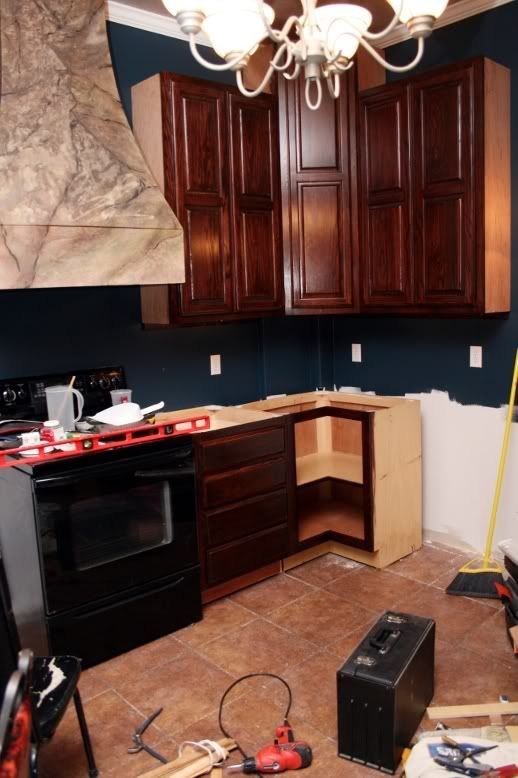
Once everything was stained and the doors were ready to go, we finished all the cabinets without their doors on a tarp out back. Next, came the fun job of hanging them. This photo shows the very first one up. We were like little kids. The next few photos just show it coming together as they were going up. They were definitely turning out as we had hoped. Lyric even stepped up to help as you can see. It was a bit surreal to us, though. After having decided what we wanted, I had drawn out the plans for the kitchen on a 3D program called Google SketchUp. We had become so used to the 3D version of the kitchen that actually seeing it come together made us feel not that we were building a real kitchen but that we were somehow placing ourselves into the 3D model.

Larry helped me get the hood vent up and installed. There was no way that that was going to happen by myself. The two of us also set up a two-man assembly line getting the hinges put back on the doors and the doors put back on the cabinets.

Again, stay tuned for the rest.


Continued on Part Eight.

Kitchen Remodel (part six)

Alright, in Kitchen Remodel (part four) I left you with this photo showing the removed cabinets and the new wiring in place and ready to go. So, the next step was to make some new walls. Now, if this were an episode of This Old House, as Monica had suggested part five was like, then I'd be nailing up all the lathe boards that I previously removed and mixing up a big pot of plaster. While doing this, I'd be explaining in a thick Boston accent how lathe and plaster was how almost all the interior walls in this part of country were finished.

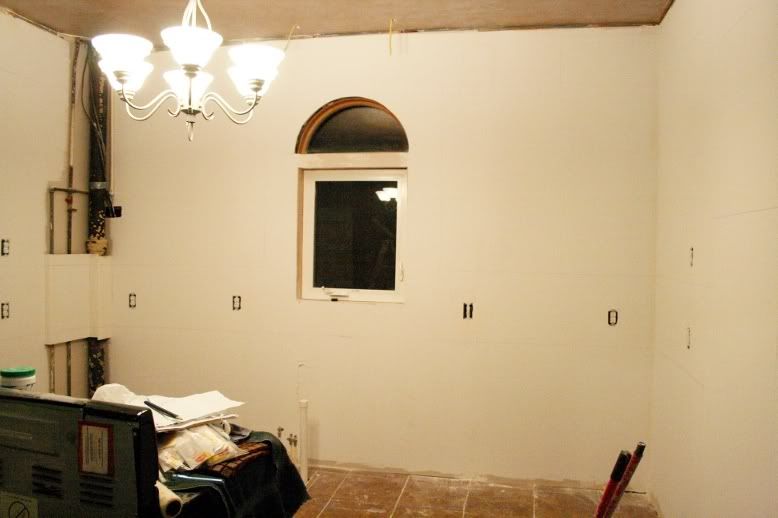
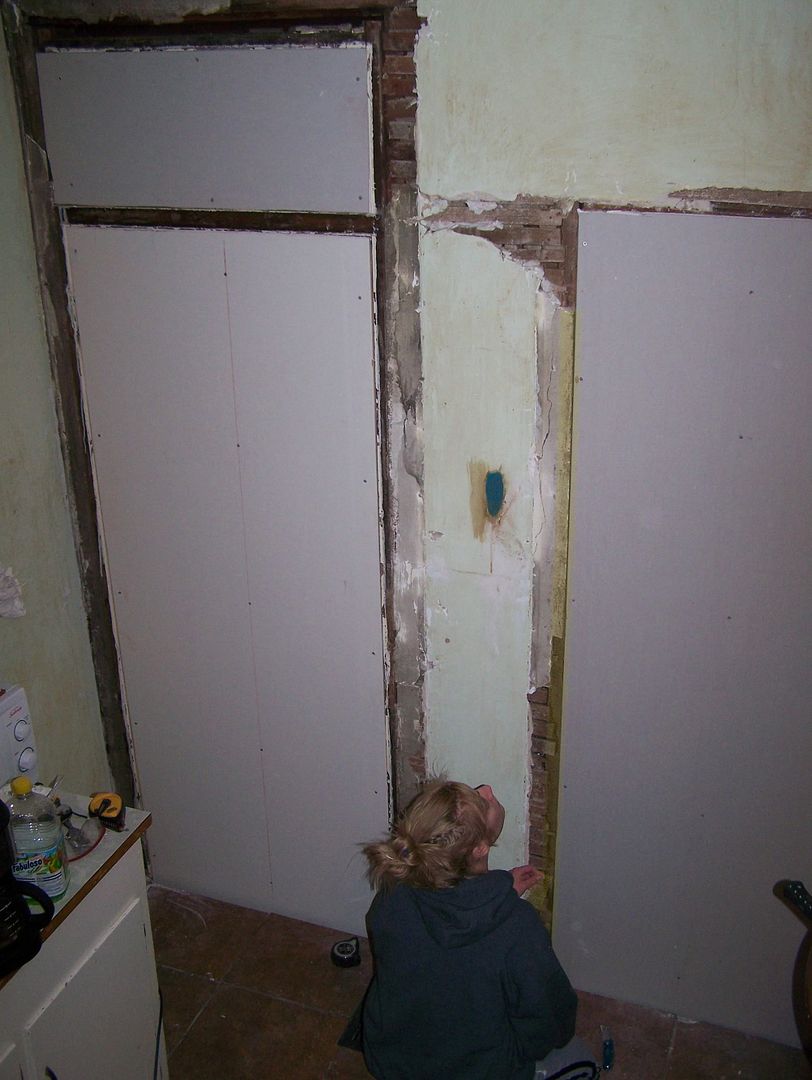
This isn't a cool show like This Old House, though. We just covered up the plaster with a layer of drywall. This makes my walls thicker which makes my room smaller by just over a square foot. Yes, I did the math. It's totally worth it, though. In other parts of the house I was forced to meet new drywall with old plaster walls and it's not easy. Hiding the joint is an art. So, here is a fake panoramic shot of the kitchen (just two photos put together) with the new drywall installed with a layer of mud. Oh yeah, and you can see my newly installed windows that I forgot to mention. I didn't take any photos of that process. Oops.

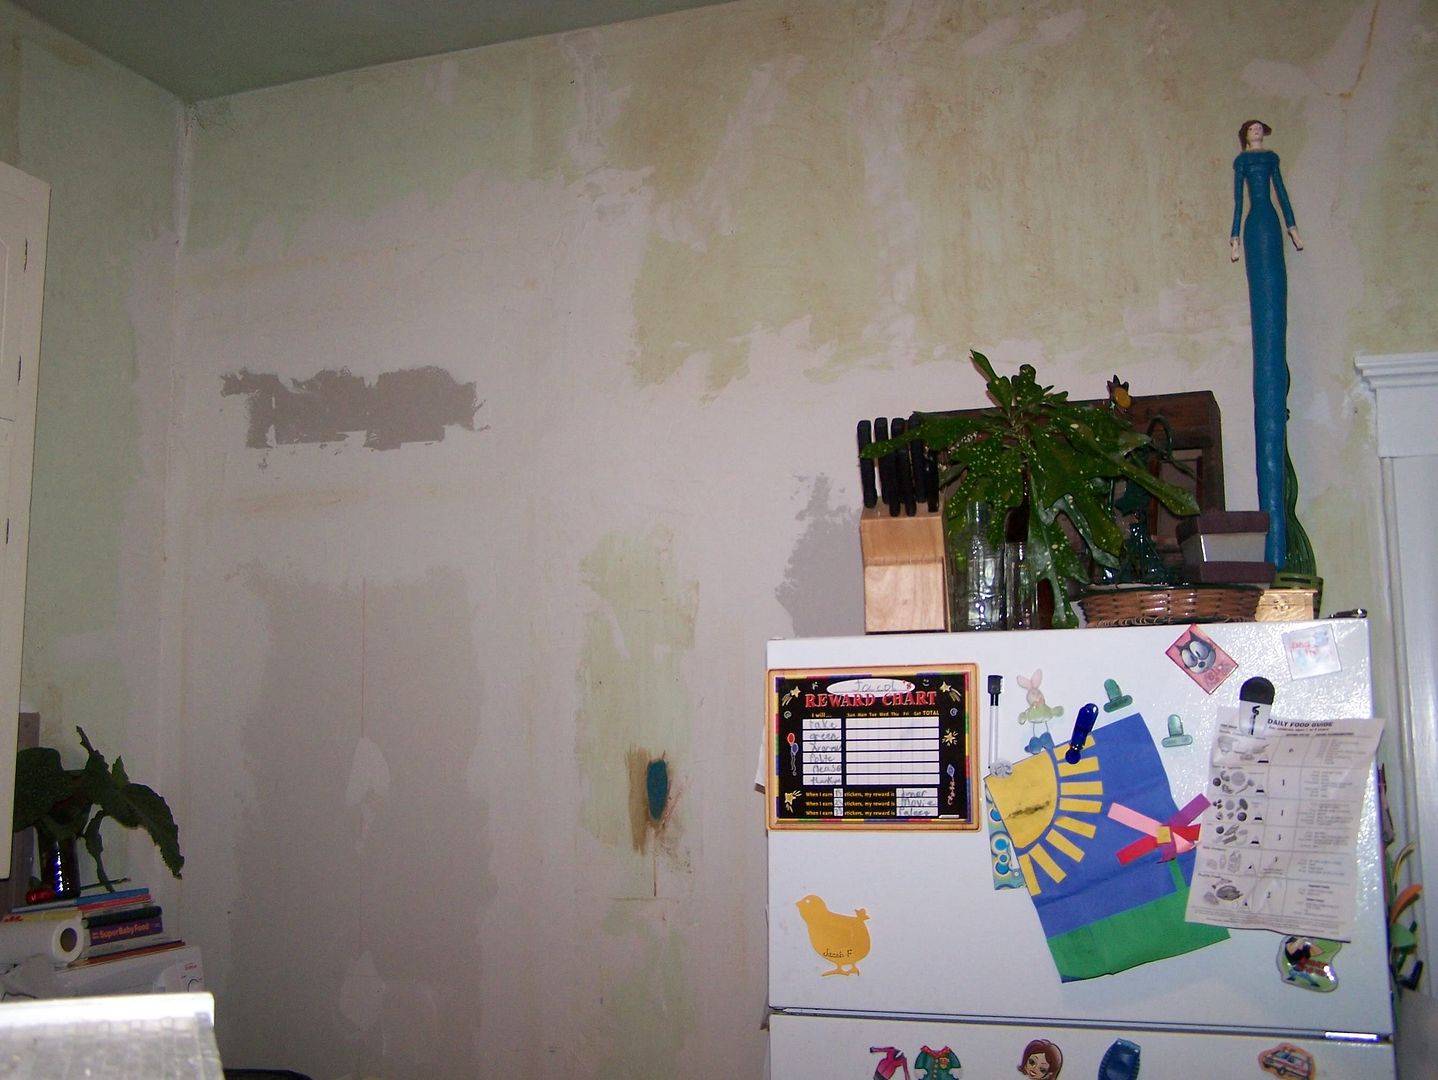
The next two photos show the walls as they looked once I got done mudding and got the walls primed for paint. This stage was exciting for us because for once it started looking like a new room. We love old houses and all, but we had been anticipating a new kitchen since the day we toured the house for the first time. I remember that day very clearly. And, it's one of my favorite things about my wife. Most women, and most men for that matter, would've walked in this house and almost immediately been turned off by the hideous wallpaper everywhere they looked, or the 1968 curtains that had likely never been washed, or the bathroom that resembled a truck stop's restroom, or the kitchen that had been rained in from broken water pipes in the bathroom above. But, my wife and I saw the same thing. We saw past all the wallpaper, dirt, and work that it would take straight through to the finished product.

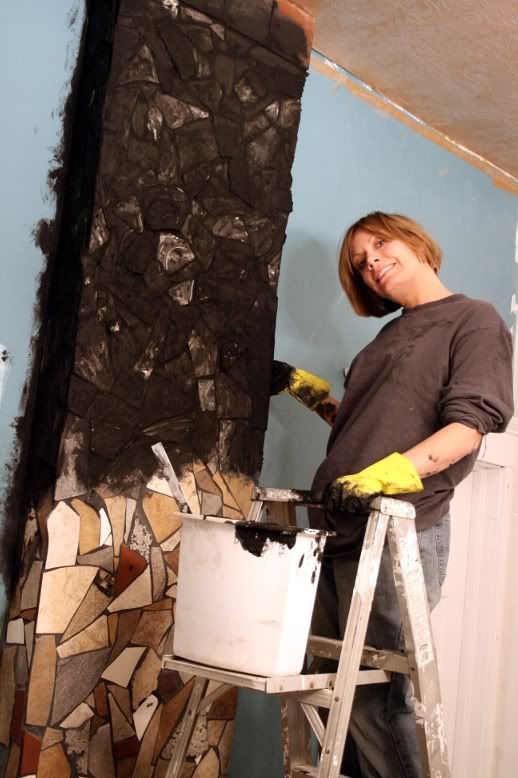
This photo is slightly off subject, but I forgot to add this one in when I was talking about the chimney a week ago. We used black grout upstairs for the bathroom tile, so we were prepared mentally for this mess. If you've ever grouted with black grout then you know, too. It's terrible. It absolutely will ruin your clothes, any towels or rags you use, the bucket, your gloves, and even your hands inside the gloves. Jodi was sportin' black hands for a week after this. Luckily for me, I managed to stay out of this project somehow. All I did was hold the ladder a few times. Cake job.

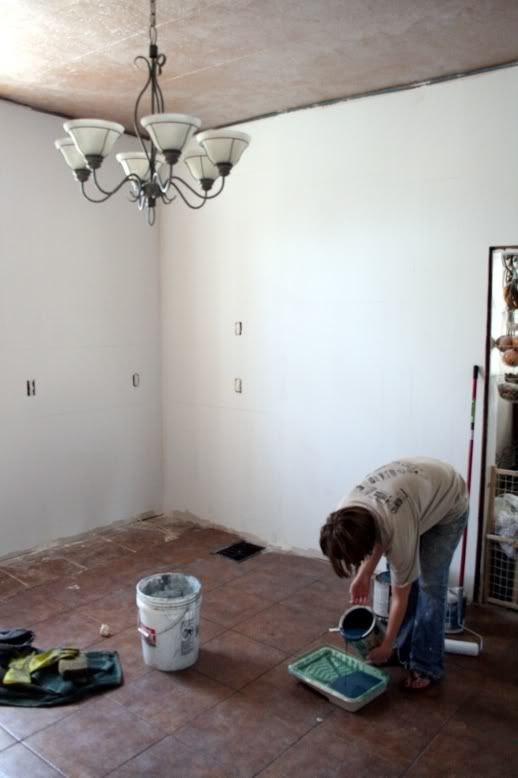
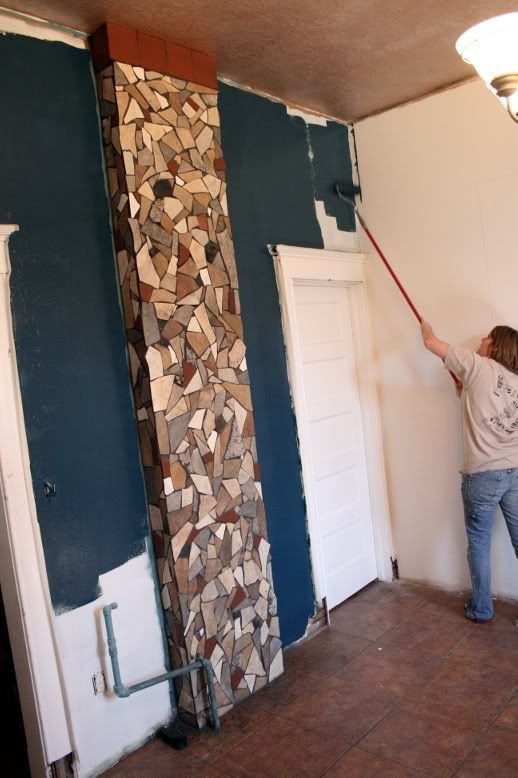
The next two photos show the walls as they were being painted. I drew out the locations of the cabinets on the wall and Jodi didn't waste paint for those areas. We only bought one gallon and we wanted plenty for touch up. The color was achieved by taking in one of Jodi's shoes and having Lowe's scan the color. We were unsure of how well they'd be able to match it, but the guy got it perfectly. He even seemed genuinely surprised at his own work. We love the color, too. In the daylight hours, you can see the subtle green tones pop out and at night it turns a very rich blue.

Then, the moment we had been waiting for... The cabinets have arrived!! Because they were so behind schedule the guy brought them to my house which was nice since that wasn't in the deal or anything. We got them all unloaded and had to send one back to be reworked that wasn't right and we were still missing the one for the corner coffee station. But, they were here! What a good day that was. Stay tuned for the next steps because they're the ones that we get to see everything come together.

Continued on Part Seven.

Kitchen Remodel (part five)

For this portion of the Kitchen Remodel blog series, I'll change the format just a bit. I apologize up front if it's a little more boring than usual, but I intend for it also to be instructional. And we all know how boring instructions can be. Also, because of the volume of photos that I have included, they're considerably small so that they don't distort the blog itself. I don't actually expect you to be able to see them in this size. As with all my blogs, you can click on the photos to bring them up to their original size and then click your browser's back button to return where you left off.

Once again, this isn't following the real life time line in which these events actually took place. I just forgot to write about it until now. It took me two days to build this hood vent and I did it back in January. I think that it was like a collective 6 hours or so that it took from cutting the first board to painting it.

Step #1: Cut out your main frame boards. Notice that I've cut out notches for 2x6 framing along the top. In the same manner, there are notches at the bottom for it to slide in the 2x10 bottom framing. You'll see later. These are tricky because the sides that you cut here are going to determine the slopes of the sides of your hood vent. Now, I wanted the top of my slope to be a straight drop perpendicular from the ceiling and gradually slope out to the corner. If you view this slope (or arc) as simply a part of circle then you can see that there is a mathematical way to draw out the arc. This beats free handing it. Unfortunately, I can't remember much from my high school pre-calculus class and so I cannot for the life of me remember how to determine the radius of a circle when all you have is a couple of known points on said circle. If you know, please comment and enlighten me. So, to draw out the arcs on my board, my wife helped me with the ol' trial and error method. I used a 2x10 placed perpendicular to my plywood board and had a string with my pencil tied to the end of it. My wife held down the string at different distances away from my first point and always gave me just enough slack to hit the first point with the pencil. Then, I'd arc it down towards the other point to see if it hit that point as well. We changed that point many times but finally found it and repeated the step for the other side of the board (measure this distance and write it down for you'll need it again for your front frame boards). Then I used the first board as a template for the second. This is the most complicated step in case you are wondering and it all would've been made much easier if I could remember that math class in which I would secretly complain to myself that "none of this stuff is used in the real world anyway, so I don't know why THEY make us learn it."

Step #2: Attach your two boards together with a pair of spacer boards. Your spacer board's length + the widths of your plywood frame boards + the width of your top framing = the depth of the top of your hood vent. If that little equation didn't make sense, it will later.

Step #3: Lay the whole thing down and attach the rest of your spacers. These do two things. They lend support to the whole structure, but they also give you something to nail your outside 1/4" plywood to. I believe I just used 1x4 pine lumber for these spacers.

Step #4: Attach the top framing together and then attach it to your hood vent. Again, I used 2x6's here.

Step #5: Construct your front frame boards. I created the arc the same way as I did the sides using that measurement that I wrote down earlier. Attach them together with spacer boards as wide as you can possibly get them without overlapping at the top.

Step #6: Attach your front frame to the main frame as shown.

Step #7: I had to attach some 2x4 blocks to the bottom to allow for the standard placement of the range hood mounting screws.

Step #8: Mount your bottom framing. I used 2x10 lumber for this and it worked great however there really is just enough room for my range hood to be installed and then the bottom of the range hood is flush with the bottom of the framing. If you want your range hood to be up in the hood vent more concealed then I suggest using 2x12 lumber instead.

Step #9: Attach some little blocks on the corners that are mitered at an angle so that you'll have something to nail the outside 1/4" panels to.

Step #10: Suddenly it's daylight! Yeah, I quit for the night after step #9 and started again here. We're ready to attach our outside plywood pieces. To make that arc cut, I had to temporarily attach my side board with a few nails. Then, I marked where the cut would need to be with my handy-dandy home-made tool as see in this picture. There may be a specific woodworking tool for this kind of thing but I don't own it, so I used what I had which was a 4' level, 2" clamp, and a carpenter's pencil. Make sure, before you cut, that it is right and that your pencil didn't move out of place and mark your board incorrectly. This worked great for me. Just make sure that you cut it slightly wider or bigger than need be. Better too big than too small. You can always shave it down a little if you must.

Step #11: Do the same thing to the opposite side and attach the boards. By the way, I attached these outside boards with some small finishing nails. I didn't do it, but in retrospect, I wish I had used some Liquid Nails along the edges of my frame boards just to ensure that the finishing nails aren't being overworked.

Step #12: Temporarily attach the front board and trace along the sides where it overlaps. Take back off and cut along the lines. Then, permanently attach front. I sanded down my edges where the two boards meet and used some drywall mud to fill in the edge that showed so that it was smooth. If done correctly with enough patience, you should have a nice slightly rounded outside joint when you're done. Cut and connect the 1/4" plywood pieces to cover the bottom framing.

Step #13: Install your hood vent for proper placement and then again remove it, but leave the screws in for easy installation when the hood vent is fully installed in your kitchen.

Step #14: Primer your hood vent and use wood filler for any places that need filled to ensure a smooth finish.

Step #15: Paint.

Step #16: I'll be trimming my hood vent to conceal all my joints. Along the bottom, I have some thin shelf trim to hide that corner edge. I have crown for where the bottom flat parts meet the sloped top parts. And, I even have some trim for where the hood vent will meet the ceiling. I also cut another piece of 1/4" plywood that goes on the bottom and trims out the range hood.

Note: I am using a standard range hood for my insert. The only problem with that is that standard range hoods have the light and fan controls on the front display panel. You will have no access to them once the range hood is installed. To accommodate for this customization I drilled a couple holes one for each control knob on the underside of the electric wiring enclosure. I, then, simply attached the controls through these holes rather than the front ones and now they are perfectly accessible once again. You can see my two knobs on the bottom of the range hood in the photo for step #13.

If you would like the plans for this project complete with custom dimensions, you can find me on the corner of Scott and Broadway usually around 2 AM. I'll be wearing a black hooded sweatshirt. The code word for the hood vent plans is "Shabalaba". Bring a lot of cash. Come alone.

Continued on Part Six.
Kitchen Remodel (part four)

First off, because of the amount of photos I have posted in this blog, I have had to make them smaller so that it all still fits somewhat nicely in this format. Do not fret, though, you can simply click on them to see them in their full sized glory. Okay. With that said, I lied what would come next in my last blog. But, not on purpose. I just forgot what was next in the process. The next project was painting the ceiling. In case you haven't seen the beginning of the ceiling renovation and you want to you can click here and it will take you to that blog. However, in case you're short on time, I'll give you the nutshell version. Television programming, I believe, calls this the "catch-up" and I will now do this in that format.


Previously on Kitchen Remodel: The ceiling had two large holes in it from myself, one from where I almost fell through from the second floor and the other from where I tore into the ceiling to fix a leak that ironically could have been fixed upstairs without tearing up the house at all, I found out later. The paint was peeling, It had water stains from a previous leak, and was riddled with cracks in the plaster. Through much pain and complaints, my dad and I managed to drywall over it. Then, I mudded it, sanded it, mudded it, sanded it, etc. until it was once again a nice flat white ceiling. Next, Daniel and I wallpapered it with some textured wallpaper that Jodi found at a yard sale for a dollar per roll.
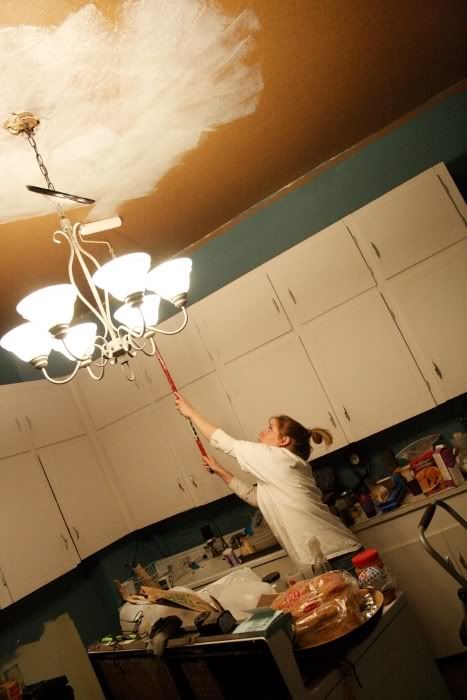
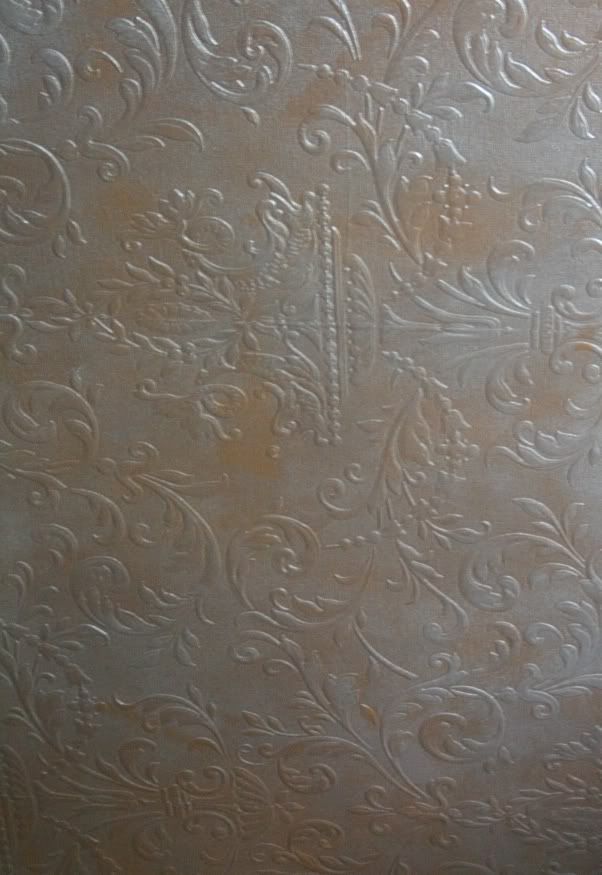
See, we wanted an antique tin ceiling, but the cost wasn't working within our budget. So, with the tin-like textured wallpaper up, the painting began as you can see from the first photo. The color was a coppery light brown that really resembled a shiny leather more than anything, in my opinion. Next came the glaze. As captured here in the second photo, the glaze was just to be rolled on. You can see how thick it is and we were impressed that such a thick paint-like substance could dry clear and leave such a wonderful metallic appeal. Well, then came the bad news. It dried, and not much had changed from the way it looked when we first applied it. The instructions we received were wrong. Or maybe they just left out a crucial step like, "don't forget to thin it down 3 parts thinner to 1 part glaze." Who knows? Either way, it all had to be done again.
Jodi, once again, painted the ceiling the shiny-coppery-leathery color, but the second time it was glazed we tag-teamed it. Jodi rolled on the glaze and stretched it to its limits while I went behind her with a dry roller and stretched it even further. The result turned out great. We're still critiquing our work and are probably overly critical of it, but it's received some great compliments. Enough that we are now satisfied with the way it's turned out. The third photo shows the finished product. The faux-tin finish also helps to reflect light and brighten up the room. This is important and you will find out later why.

With the floor finished and the ceiling finished, all we had left to do was walls. This amounted to removing the old cabinets and officially removing a kitchen from the house. From this point on, we would now have to wash dishes in a bathroom sink. To relieve the amount of these dishes we would buy paper plates and plastic-ware and Styrofoam bowls and microwavable frozen foods. We knew that this would be an unhealthy time for us, but that we could start cooking healthy and actually enjoy the cooking part in our brand new kitchen when it was all done. So, you can see the removed cabinets in this next picture. It was pretty ugly back there. And the pipes were going to pose a tricky little problem for the wall corner cabinet, the base corner cabinet, and the counter top. I rerouted the water pipes a little to gain a little bit of space and to minimize as much cutting of the back of the wall cabinet as possible.

The last photo of the kitchen shows how I had to tear into the walls to get to the studs so that I could run all new electric wiring. The kitchen had only had two receptacles originally. At some point, probably in the early sixties when the cabinets were installed, someone had added a single receptacle for a refrigerator. You can also see that there was originally another window in the kitchen on the south wall. They covered it up to make room for these cabinets. So, it's only natural that Jodi and I open the back wall back up and add a couple windows there.

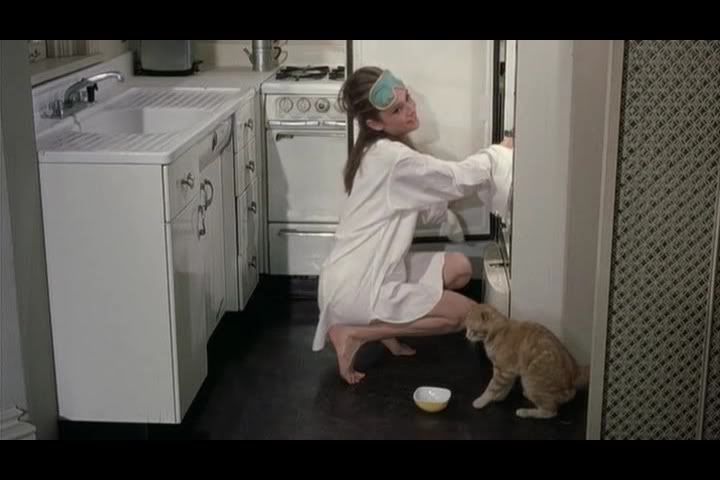
The last two photos are simply for fun. I spotted the ribbon when it fell while I was ripping out the western-most cabinet. Since these cabinets had no backs to them it must have slipped down between the wall and the cabinet itself and was hanging there out of site on the ledger board for decades. It's in perfect condition and is slightly older than I am. The other photo is a still shot of the movie Breakfast at Tiffany's. Audrey Hepburn's character, had this small apartment which sported a sink cabinet unit that is almost identical to ours. We've kept the sink, but I have no idea what we will wind up doing with it. It's too cool to toss or give away.

So that catches us up to the point where I was ready to install the window and start drywalling. So, that's what I'll go over next time. See you then.

Continued on Part Five.

Kitchen Remodel (part three)

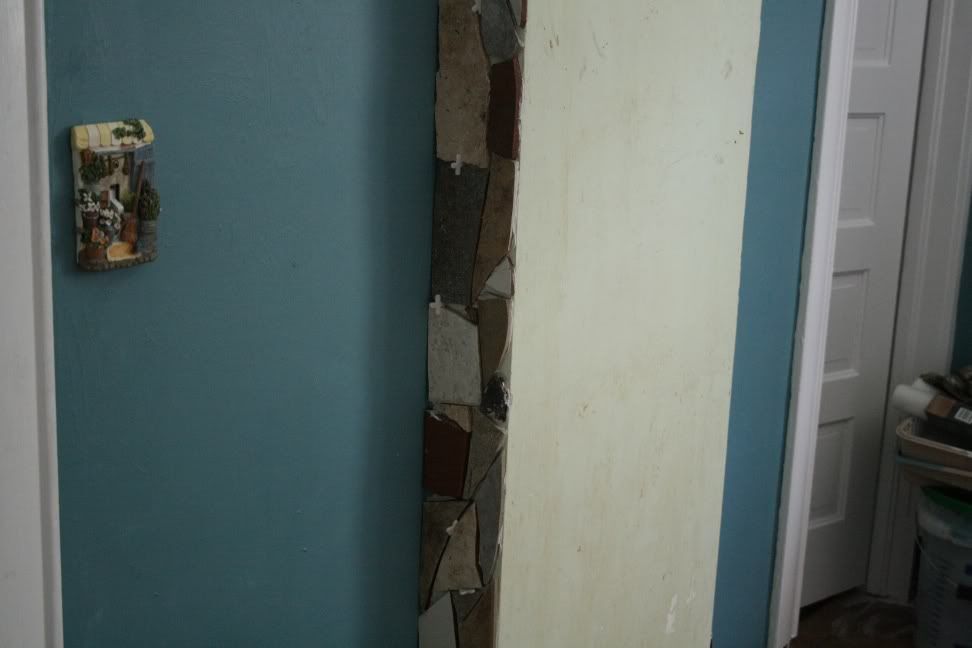
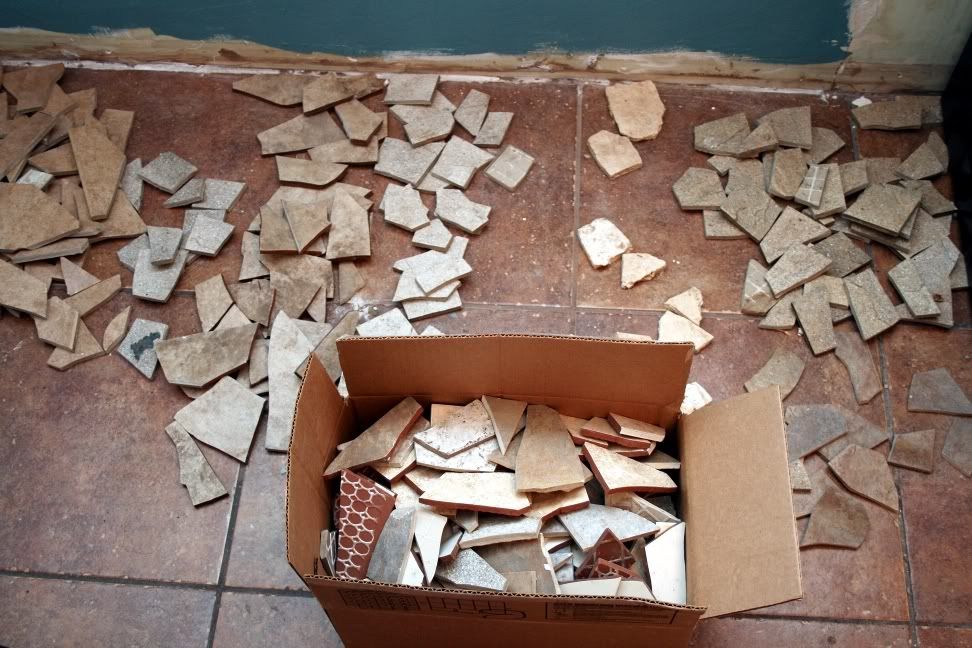
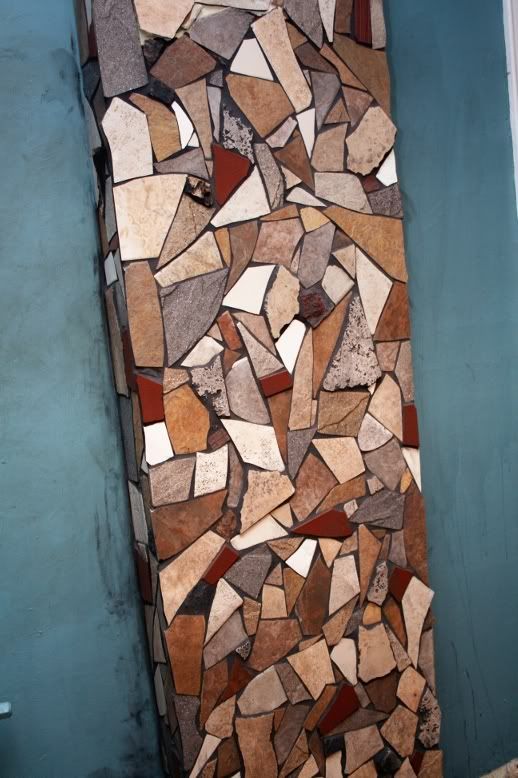
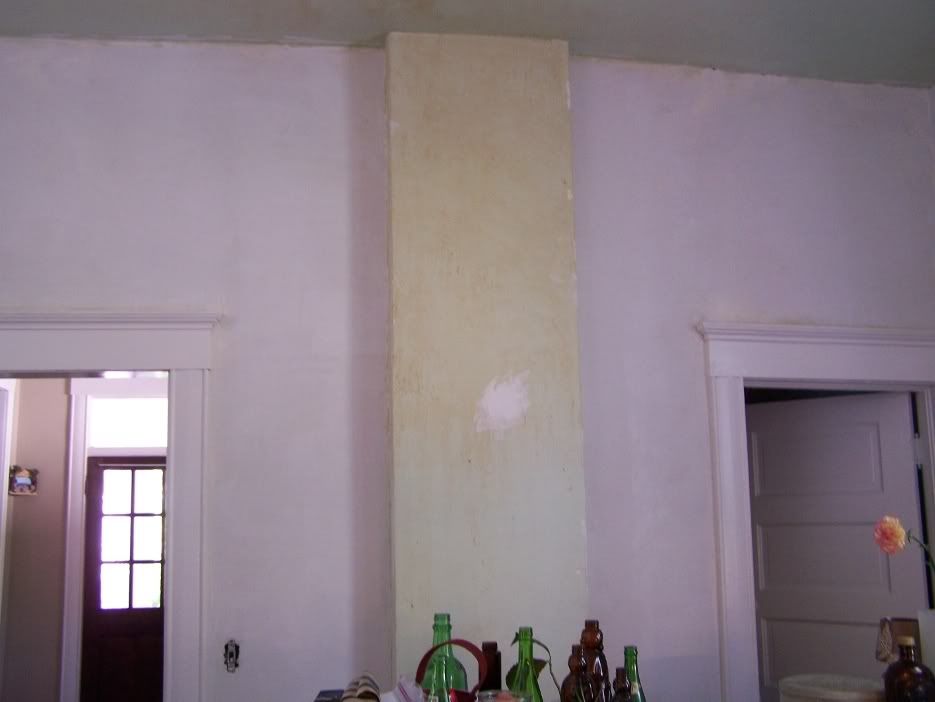
So far for the kitchen renovations blogs I've covered the tiling of the floor, the removal of wallpaper, and the enclosing of two unnecessary doorways and one window. I also covered the drywalling and texturing of the ceiling in a previous blog a few months ago under the title 'Ceiling' is a Funny Word. Today, I'll show you the chimney and the pot rack. The first photo here shows the chimney as it looked after the removal of the wallpaper and after we primered the rest of the walls. One original thought we had was to tear away at the plaster and expose the brick underneath but to do it only in sections. We've seen this in a multitude of places and I always have liked the old effect that it gives with the multiple mediums. However, I drove the claw end of the hammer into the plaster over and over again until I finally started to see brick. It was not an easy process and it would have taken forever to get it all cleaned off in sections. So, we scrapped that idea in favor of having Jodi tile it with our wide selection of broken tile.

I was glad to finally have a use for this broken tile as we had moved it three times. If you've ever had to move large amounts of tile, you know that it's no fun. Add to that that the tile was broken already, so it's foreseen value was easy to be seen as zero. The tile came from a flooring store on West Battlefield. We asked them to toss their broken tile into a crate that we provided instead of tossing it into the dumpster. They agreed and said that they would call when it was full. In no time, they called and luckily they were gracious enough to use the forklift to pick up the crate and set it into the back of my truck. As much as my truck audibly contested the tiles placement it still managed to get it home alright. That was when we lived in an apartment. We moved from there into a house and painstakingly moved the tile again, but without the assistance of a forklift this time. We sat on it the entire time we lived there and then packed it up again for the trip to our current home. The guys helping us move were none too happy about the prospect of possibly throwing out there backs for a bunch of seemingly useless and extremely heavy buckets of what most people would consider garbage.

Despite this hardship that the tile burdened us with over a couple years we still managed to hold on to it amidst the laughter of some. In the second photo you can see Jodi's start on tiling up the side of the chimney. I still wasn't sure about the whole idea being a good one until this point. Once this small section came together I could finally see what Jodi had had in her head for some time. You can also see the country blue walls that we tried out but quickly discovered was not the color we were looking for.

In the next photo you can see the finished product with the black grout. After that is the pot rack that we built. Never mind the half-way done chimney tile project behind it. Apparently, my story blogging isn't always done on a linear time line. Anyway, we forgot to take photos of it during the building process so I only have the finished product photo. It's simply made out of dowel rods, 2x4's, some scrap 1/4" plywood, and S-hooks. It was cheaper to build this than to purchase one. The biggest benefit to building it, though, was having the ability to move the hooks. Everyone I saw in stores and online were seriously lacking in both the quantity of hooks and their ability to move them around on the frame.

Stay tuned for the next installment of "Kitchen Remodel" where I'll be covering DEMOLITION (spoken like a tractor pull radio advertising announcer), window installation, wiring, plumbing, and drywalling. If that will all fit in one blog. Ciao.

Continued on Part Four.

Kitchen Remodel (part two)


With the floor tiled, grouted, and sealed, as seen in this first photo, it was time to move on to something else and yet take a moment to enjoy and appreciate a real floor that the 5-second rule can apply on. The next project in here wouldn't come for a while. But, when it did it was actually just part of the salon/studio project. It was covering up the original back door and hallway door.

Originally the house had 4 doorways and 2 doorway-sized windows in the kitchen. Apparently, people in 1909 didn't have cabinets and counter space like people must have now. To make things worse, someone pre-1950 decided to shorten the massive dining room by creating a awkwardly configured hallway/storage closet. They added yet another doorway to the kitchen to pull this off thus giving it a ridiculous amount of doorways at an astounding 5. So, by covering up two of these we managed to create enough space for a proper modern kitchen layout.

Included in the new layout was also a large custom built hood vent that would actually blow the air outside instead of simply recirculating all the smoke and grease and blowing it in your face as you cook. This new layout had no room for the 7-foot window that stood on the east side of the room. We really didn't like the idea of taking it out, though, since it was our only source of natural light. We were comforted, however, when we reminded ourselves that the darkness was only temporary and that someday in the future we would open up the south wall and install a new window above where the sink would be going.

You can see in the photo progression that the window removal was completed in an afternoon complete with the future-needed vent tube.

That's all I have time for today. Coming up next is the chimney and pot rack projects. So stay tuned... Part Three.

Twitter Delicious Facebook Digg Stumbleupon Favorites More