First off, because of the amount of photos I have posted in this blog, I have had to make them smaller so that it all still fits somewhat nicely in this format. Do not fret, though, you can simply click on them to see them in their full sized glory. Okay. With that said, I lied what would come next in my last blog. But, not on purpose. I just forgot what was next in the process. The next project was painting the ceiling. In case you haven't seen the beginning of the ceiling renovation and you want to you can click here and it will take you to that blog. However, in case you're short on time, I'll give you the nutshell version. Television programming, I believe, calls this the "catch-up" and I will now do this in that format.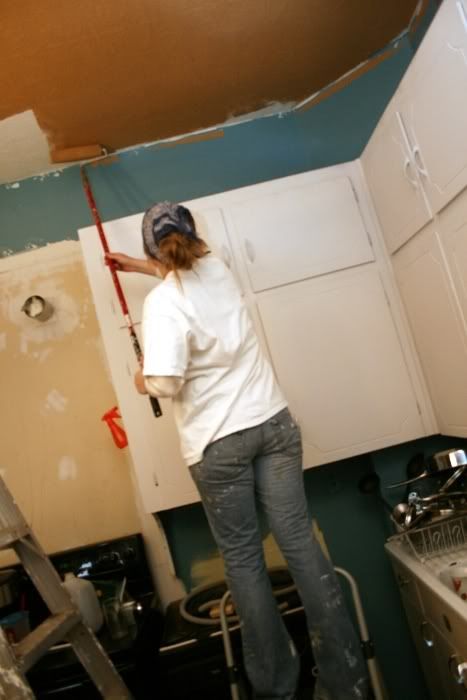 Previously on Kitchen Remodel: The ceiling had two large holes in it from myself, one from where I almost fell through from the second floor and the other from where I tore into the ceiling to fix a leak that ironically could have been fixed upstairs without tearing up the house at all, I found out later. The paint was peeling, It had water stains from a previous leak, and was riddled with cracks in the plaster. Through much pain and complaints, my dad and I managed to drywall over it. Then, I mudded it, sanded it, mudded it, sanded it, etc. until it was once again a nice flat white ceiling. Next, Daniel and I wallpapered it with some textured wallpaper that Jodi found at a yard sale for a dollar per roll.
See, we wanted an antique tin ceiling, but the cost wasn't working within our budget. So, with the tin-like textured wallpaper up, the painting began as you can see from the first photo. The color was a coppery light brown that really resembled a shiny leather more than anything, in my opinion. Next came the glaze. 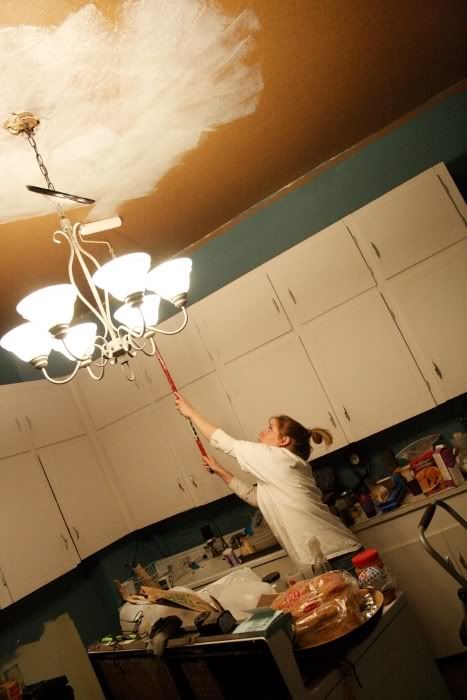 As captured here in the second photo, the glaze was just to be rolled on. You can see how thick it is and we were impressed that such a thick paint-like substance could dry clear and leave such a wonderful metallic appeal. Well, then came the bad news. It dried, and not much had changed from the way it looked when we first applied it. The instructions we received were wrong. Or maybe they just left out a crucial step like, "don't forget to thin it down 3 parts thinner to 1 part glaze." Who knows? Either way, it all had to be done again.
Jodi, once again, painted the ceiling the shiny-coppery-leathery color, but the second time it was glazed we tag-teamed it. Jodi rolled on the glaze and stretched it to its limits while I went behind her with a dry roller and stretched it even further. The result turned out great. We're still critiquing our work and are probably overly critical of it, but it's received some great compliments. Enough that we are now satisfied with the way it's turned out. The third photo shows the finished product. The faux-tin finish also helps to reflect light and brighten up the room. This is important and you will find out later why.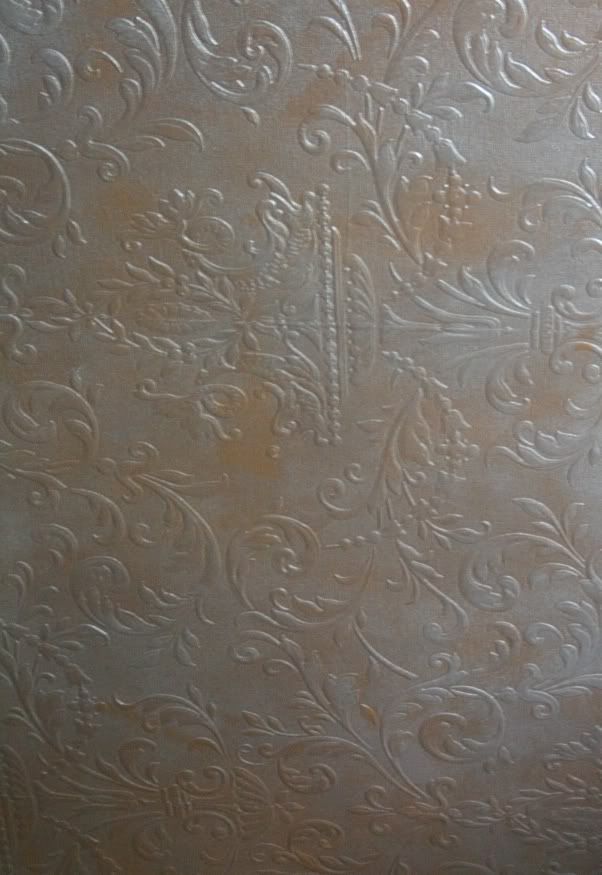
With the floor finished and the ceiling finished, all we had left to do was walls. This amounted to removing the old cabinets and officially removing a kitchen from the house. From this point on, we would now have to wash dishes in a bathroom sink. To relieve the amount of these dishes we would buy paper plates and plastic-ware and Styrofoam bowls and microwavable frozen foods. We knew that this would be an unhealthy time for us, but that we could start cooking healthy and actually enjoy the cooking part in our brand new kitchen when it was all done. So, you can see the removed cabinets in this next picture.  It was pretty ugly back there. And the pipes were going to pose a tricky little problem for the wall corner cabinet, the base corner cabinet, and the counter top. I rerouted the water pipes a little to gain a little bit of space and to minimize as much cutting of the back of the wall cabinet as possible.
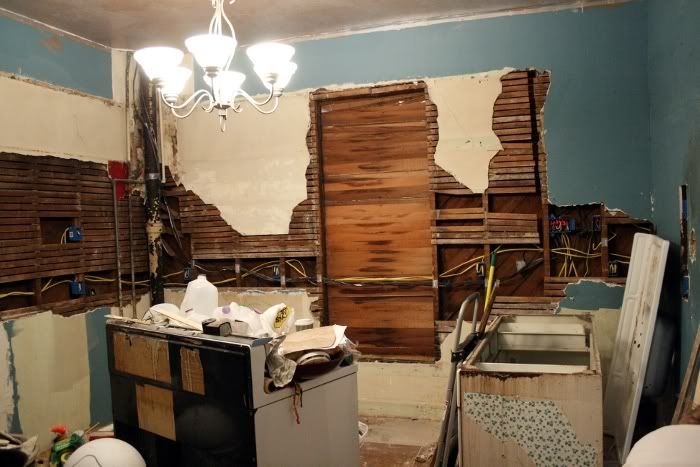 The last photo of the kitchen shows how I had to tear into the walls to get to the studs so that I could run all new electric wiring. The kitchen had only had two receptacles originally. At some point, probably in the early sixties when the cabinets were installed, someone had added a single receptacle for a refrigerator. You can also see that there was originally another window in the kitchen on the south wall. They covered it up to make room for these cabinets. So, it's only natural that Jodi and I open the back wall back up and add a couple windows there.
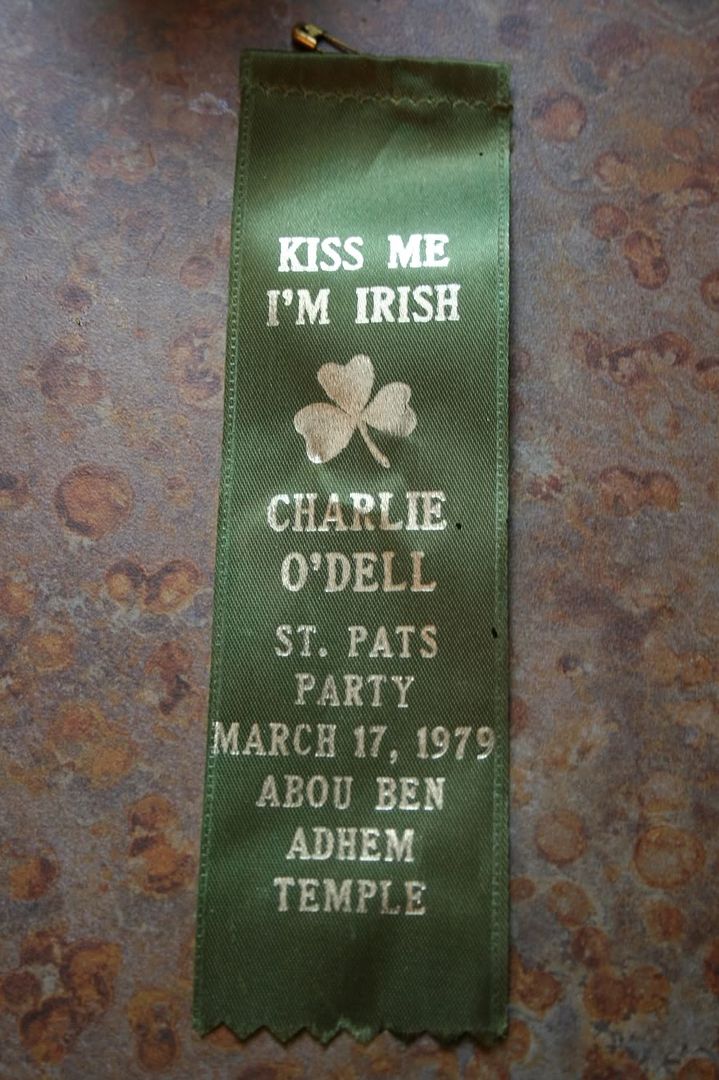 The last two photos are simply for fun. I spotted the ribbon when it fell while I was ripping out the western-most cabinet. Since these cabinets had no backs to them it must have slipped down between the wall and the cabinet itself and was hanging there out of site on the ledger board for decades. It's in perfect condition and is slightly older than I am. The other photo is a still shot of the movie Breakfast at Tiffany's.
  Audrey Hepburn's character, had this small apartment which sported a sink cabinet unit that is almost identical to ours. We've kept the sink, but I have no idea what we will wind up doing with it. It's too cool to toss or give away.
So that catches us up to the point where I was ready to install the window and start drywalling. So, that's what I'll go over next time. See you then.
Continued on Part Five.


Profile

- Levi Felton
- I'm difficult to explain, but I will attempt. I am a fantastic husband, father, and employee. I have an amazing array of talents. I never stop leaving others in awe with my actions. I love my life, because my life is so great that it's virtually impossible not to love it. Finally, I also have a fair amount of self esteem. And people say that I'm often sarcastic but I don't know why.
1 comments:
A well-planned renovation featuring kitchen remodel ideas can increase property value and enhance everyday living.
Post a Comment