The First in the Deck Series

Our most recent DIY experience through the process.

Out With The Old, In With The New

Gotta love a new beginning, right?

Peppermint Shortage

Just a funny afternoon.

Coffeyville, KS

I loved this experience so much that I had to write about it. Then, through e-mails it spread to Coffeyville itself.

Photo Restoration

I had a lot of fun with this "old school" photo. It turned out too cool to not blog about it.

Kitchen Remodel (part one)

This is the first of a nine-part series documenting the remodel of our 50-year-old kitchen in our 100-year-old home!

Showing posts with label home renovation. Show all posts

New Roof

We are blessed to be able to put a new roof on our house.  We're especially excited about it, because our house needed it both practically speaking as well as aesthetically speaking.  We had a few shingles blow off entirely after a super-windy night and had several others that broke their seal and flipped up, creasing them to the point of breaking.  Upon further inspection, the vast majority of the shingles had had their seals broken and were thus subject to damage with future winds and likely had their nails securing them partially pulled up allowing for potential future leaks.

Our first obvious challenge was that we were provided enough money to buy the materials, but no more.  So, that left us with two options.  A: We would not put a new roof on the house and begin to experience problems in the future.  Or B: We could put on a new roof ourselves.  We went with B.

So, with that decided, our first order of business was to pick out and order our shingles.  That went fairly well.  We had to wait on them to be ordered, arrive at the store, and then be delivered, but it went pretty well.  Our next challenge was getting them on the roof.  We wanted rooftop delivery, but, apparently, our local Home Depot doesn't have a truck for rooftop delivery.  So, they have a third party company do it for them.  It's not cheap for this service.  And, I feel like Home Depot knows it.  So, rather than Home Depot telling you the delivery charge for rooftop delivery, they just change the price of the bundles of shingles you're buying.  You know, to muddy it up because they don't think that their customers can do math.  It worked out to just over $450 for them to rooftop deliver.

We were kind of floored with this price because I was hoping that delivery would be free or at the very least would be greatly reduced.  We were buying 123 bundles of shingles after all.  That adds up to a pretty hefty price tag.  Most box stores boast free delivery when you're spending thousands of dollars.  But, alas, there would be no foreseeable compromise.  So, we opted for the normal delivery which would still be on their pallets on the ground.  To their credit, they did put the pallets right on the ground exactly where we told them that we wanted them.  So, there's that.

My ingenuitive nerdiness came out with this challenge.  I designed a "shingle elevator" in Sketchup from materials that I knew I already had.  It went together fairly quickly and worked really well.  It's limitation was that it required three men.  One guy (my friend, Rodney) would have to pull bundles off the pallet and load them on the elevator one at a time.  Another guy (my friend and neighbor, Brian) would have to pull the elevator up using the rope and hold it while the last guy (me) would need to pick up the bundles and go spread them out across the ridge of the roof.  My use of the term 'elevator' denotes a sort of effortless tool.  I cannot stress enough how poor of a choice of terms this was.  None of the three parts to the job was, by any means, effortless.

I bought dinner for the guys, but, besides a lot of spent energy, that was our only cost to getting the shingles on the roof.  That was the evening of Thursday, April 6th.

We employed our son, Lyric, whose agreed upon paycheck would consist of a Playstation 3.  He had been wanting one for some time and we figured that this would be a great opportunity for him to A) learn how to roof a house, B) learn some more work ethic, C) earn the item he couldn't afford to buy, and, lastly, D) help complete the roof at a much faster pace than it would have taken me to do it alone.  He did a fantastic job and I officially changed his affiliation with it from "helping me roof the house" to "roofing the house with me."  :)

Finishing the job was an awesome feeling.  We got it done on Sunday, April 23rd, just two and a half weeks from the start date. Not too shabby for such a small crew.


Hot Wheels Collection Organization

From the blog: a Low and behold life (link in 1st paragraph)
My wife found a really nice solution to store our son's HUGE Hot Wheels collection online.  I can't recall if it was Pinterest or Google Images where she found the photo, but regardless of where it was seen, it's true source was from a blog called a Lo and behold life.  They repurposed a wooden shoe rack from Bed Bath and Beyond into a really cool and useful shelf system for their twins' toy cars.

We decided to give the DIY project a shot. The shoe racks were available at our local Bed Bath and Beyond store, so we picked those up last Friday.  We commenced to painting them the following day using our new handy dandy Wagner paint sprayer.  It took Jodi some trial and error with the sprayer to figure out what works best, but she had everything painted in record time.  She also used a ton of paint in record time.  I expect that we will get the settings all optimized the more we use the sprayer.  However, right now, it appears that there's a trade off of paint usage to speed and ease of application.  Maybe, I'll do an official review of this sprayer once we have used it a lot more and figured out how to better balance ease and efficiency.

We hung our shelves differently than how our inspiration did.  They connected two shelves in tandem so that each shelf was wider than the cars.  We stuck with one shelf because the vast majority of the cars easily straddle the single shelf.  By straddling the shelf, the cars don't roll around when you take them down or put them up like they would if they were sitting on their wheels.  This makes them more stable on the shelf.  And, as a bonus, we were able to make twice as many shelves as we would have otherwise.

With the cars having to straddle the shelves, however, I was going to have to space the shelf out from the wall about a half inch.  I could have bought spacers or used washers or something, but the cheapest and most customizable option was to get a 30" PEX water supply line from Home Depot (pictured to the right) and then cut it up with a utility knife to make the perfect length spacers for this application.  One of these lines is only $1.58 at my local Home Depot store.

Here's how our shelves turned out.  Lyric loves them and meticulously placed all his cars on the shelves himself with pride.  Now he has easy access to all his cars.  He can see them all, so he can pick which ones he wants to play with.  And, he'll have fun putting his cars up when he is done.

We also built a bunch of shelves out of pallet wood that was being discarded at my work.  I snatched it all up  and Lyric and I made a bunch of shabby-chic shelves in no time.  


All the shelves displaying his Hot Wheels collection.


A little more detail to show the shelves spaced off the wall.
Two of the shelves we made from pallet wood being held up by standard shelf brackets.
  
Four more super-long shelves for the craft room.


Poorly Installed Electrical Recepticle Quick Fix

I'm not prone to posting "how to" videos, but I am commonly searching them out and have been helped tremendously through the years by those willing to post them, so I thought as I do things that others may find helpful, I should document what I am doing to help them out when they go searching the Internet for help.

This is a fix for those wall outlets that are too far back to properly put a wall plate on.  This also fixes wall outlets that move around when you go to plug something into them.  The root problem is the same: the electrical box was installed too deep in the wall.  A properly installed box will take into account the thickness of the drywall to be hung so that once the drywall is hung the box will be flush with the surface of the finished wall.

This outlet had a box that was way too far back and I couldn't even put a wall plate on it with the screw that came with it.  I had to find a longer screw to attach it but it still looked terrible with the outlet so deep.

To be safe, flip the breaker to the off position for the circuit that you will be working on.  Confirm that there is no power in the outlet by testing it with something.

Remove the wall plate.  Then, remove the outlet by taking the top and bottom screws completely out.

Reinstall the outlet but add some washers to the backside of the screw so that the outlet will stand further out.  I used two nuts for a larger sized screw in place of washers since I had so much distance to make up.

Add back the wall plate.  Add more washers or take some away as needed to acquire a perfect fit.  The wall plate should be snug to the wall on all four sides and the outlet should be flush to the surface of the wall plate.  If your wall plate starts to bend into a convex shape as you are attaching it, the outlet likely needs to be further out so add more washers.

Empty House

The night before our closing, we stayed up till almost 4:00 in the morning cleaning, caulking and painting.  We realized that most people would have just packed their things and left whatever needed to be done for the next owners at this point.  But, we're not most people.  Although, many times throughout the weeks leading up to this point and certainly during the wee hours of the morning before the closing, I wanted to just give up and do like most people would have done.  But, my own desire to honor this home and the next owners of it combined with the motivation of my wife's unfaltering commitment to her desire to do the same kept me on track.

We finally broke for a couple hours of sleep only to get up and start the finishing process anew.  We got the beds loaded up and secured into the back of the truck and shoved the last of the tools and painting supplies into the last open space in the car just as the new owners were pulling up in their U-Haul truck to do the final walk-through before they signed the dotted line (about 20 times along with 20 sets of initials).  We grabbed the guy next door to take some pictures of all of us before we left it for good.

I would say that it was bittersweet, but I wouldn't be telling the whole truth.  It was pretty sweet.  I enjoyed our home on Scott Street and we built a brainful and heartful of memories there, for sure.  But, we took with us all that matters so I'm not in the least sorrowful to drive away from it.  I feel accomplished for what we did there.  We were afforded the opportunity by our God who loves us to take an old unloved house and pour into it all the love and care that we had to offer it.  I feel like we did the house justice and the neighborhood in which it resides.  We felt all along that we weren't just fixing up our own house, but that in our small part we were also bringing up property values on our street and in our neighborhood.  No doubt, this sale will be used for future sales as a comparable and will help pull those figures higher into a new level of dignity.  Few neighborhoods in Springfield can boast so much history and turn-of-the-century charm, it's only right that it can begin to boast home value, as well.

No.  Bittersweet isn't the word.  Surreal, maybe.  I don't know what I expected when we finally sold the house.  Fireworks?  A parade?  I don't know.  But, aside from my little family doing the happy dance several times throughout the process, it almost seemed anti-climactic.  Like, a pivotal moment in our lives went by just a little too smoothly.  It's strange to anticipate something for so long and then have it happen in a blink of an eye and find yourself on the other side of it almost emotionless.  Shouldn't I be shedding some tears or shouting from a rooftop or something?  Don't get me wrong, I'm very happy that we sold and I'm equally happy that we've bought our new home.  And, I don't feel like I'm missing anything.  It's just that I'm surprised to find myself where I am, physically and emotionally.  Or perhaps, better stated as emotionless.

Maybe, reality will hit me at some point.  Perhaps I'm too busy with the details of unpacking and organizing our new home to stop and realize just what has happened.  We will see I suppose.

Without further ado.  Here are the photos I promised yesterday.


Movin' to the Country, Gonna eat a lot o' Peaches

Where do I begin?  Maybe at the end?  Yeah, let's do that.

We moved!!!  Woo Hoo!!!

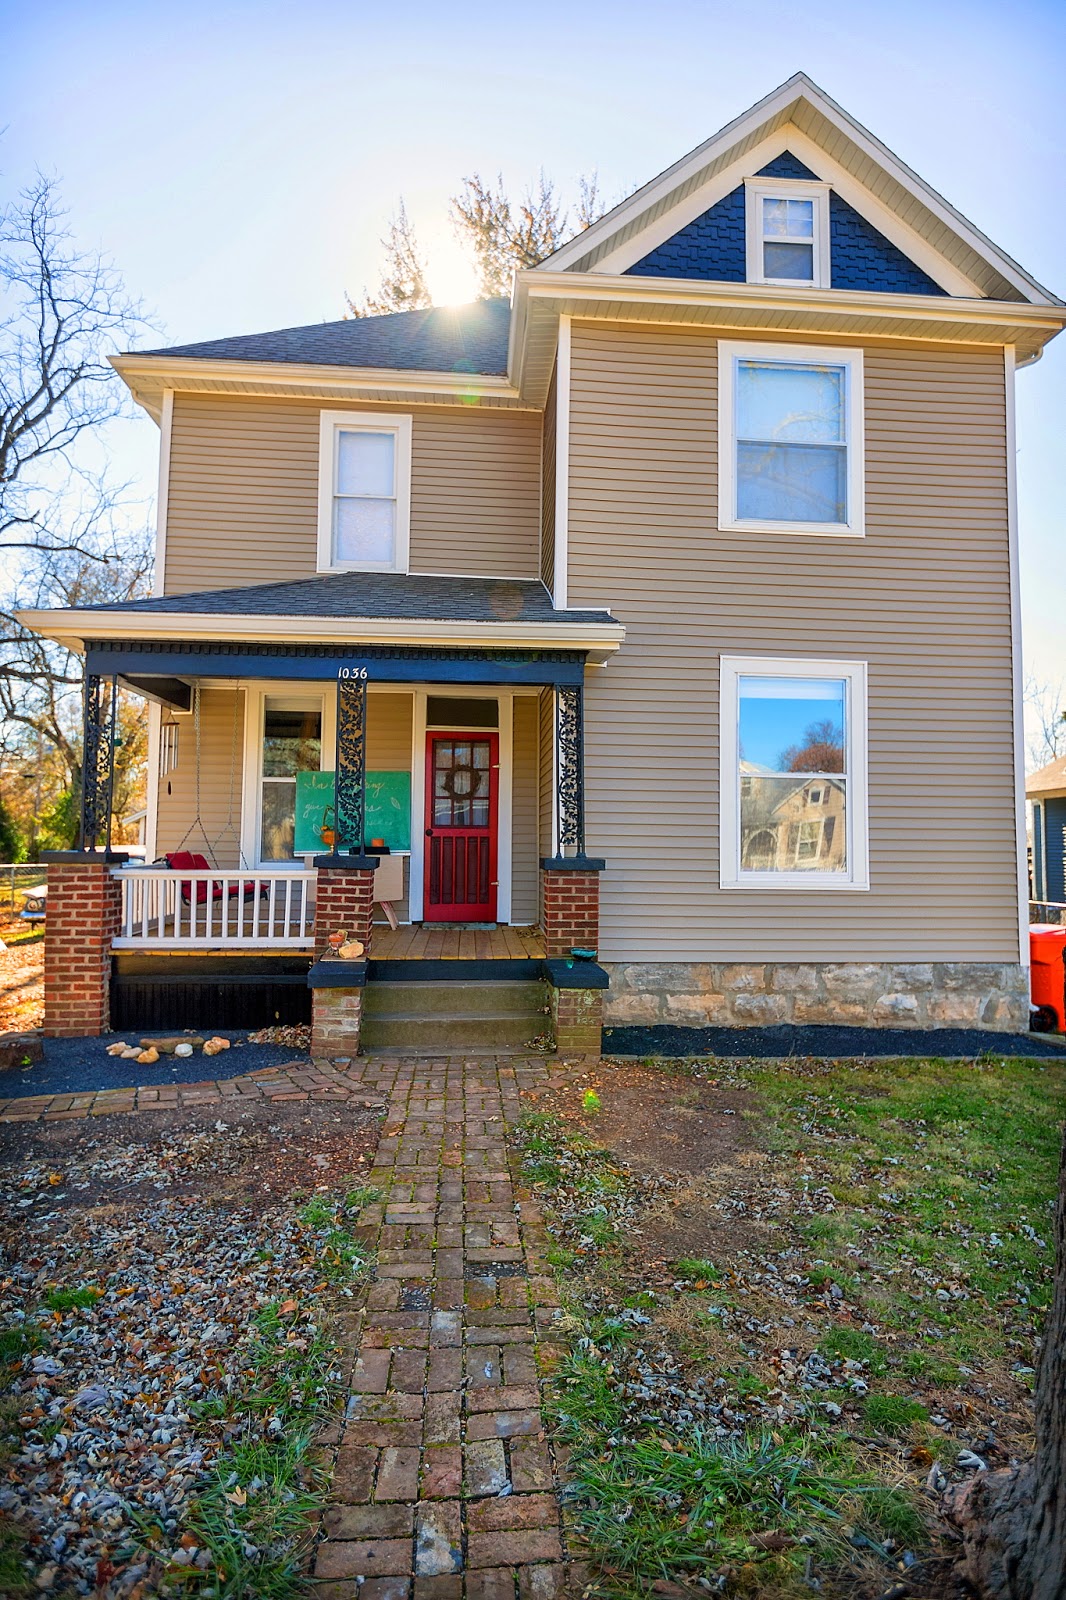
If you've been following my blog at all, you know that Jodi and I have been renovating our house for a LONG time.  Since we bought it in February of 2007, to be exact.  Well, we finished it and sold it.

We're extremely happy and excited about our new beginning in our new home... in the country!

But, before I do any revealing of that, I think I'll bounce back in time a bit and show all the listing photos for historical posterity.  Then, maybe tomorrow, I'll post a bunch of the last photos I took while it was still ours to take pictures of.


Twitter Delicious Facebook Digg Stumbleupon Favorites More